Measuring DX Evaporator Coils For Pricing: In the field with Chris Wright
Measuring DX Evaporator Coils For Pricing: In the field with Chris Wright
A step-by-step guide with visual tips to help you measure a DX evaporator coil accurately and confidently.
My first time looking at and attempting to measure a DX/evaporator coil was quite intimidating. The first DX coil I encountered had four circuits, two intertwined and two face-split, with what seemed like a thousand capillary tubes. Plus, it was installed at an angle. In reality, DX/evaporator coils are not much more complicated than other types; they just have distributors that need to be considered during measurement. Still, I wasn't sure how to price it competitively.
There are several techniques to ensure accurate coil sizing, along with supplemental data from clients that can optimize performance. Having a coil schedule—a chart showing estimated performance and capacities based on input specs—or any available performance data can be helpful when dealing with space restrictions. Additionally, this information is useful during the quoting process as well.
Although we often only visit a site once per job for the client's convenience, there are many situations where we measure coils for budget pricing and know we'll return later for more details. For these budget scenarios, especially when measuring a large number of varying DX/evaporator coil sizes, there are certain variables you can rely on for quick and accurate pricing to the customer.
Before starting, get a free blank coil worksheet to record your measurements.
1. Measure the finned height, from the top to the bottom of the fins on one end of the coil (not in the middle of the coil face).
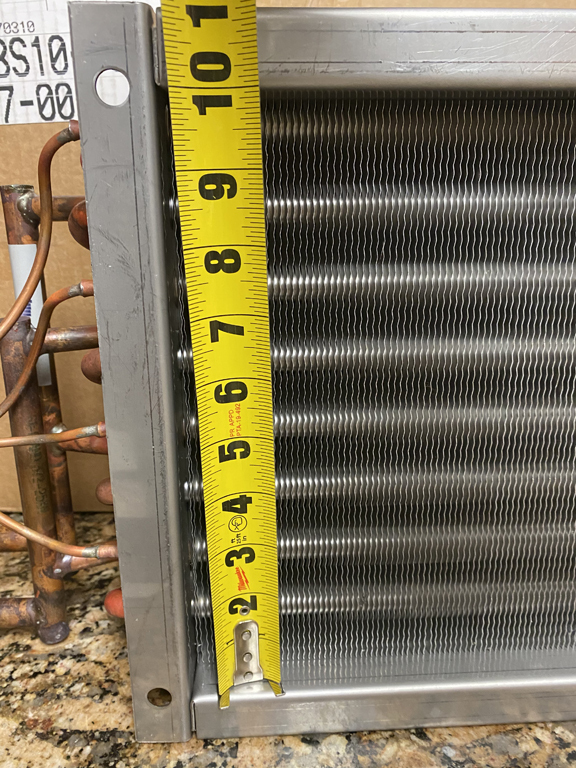
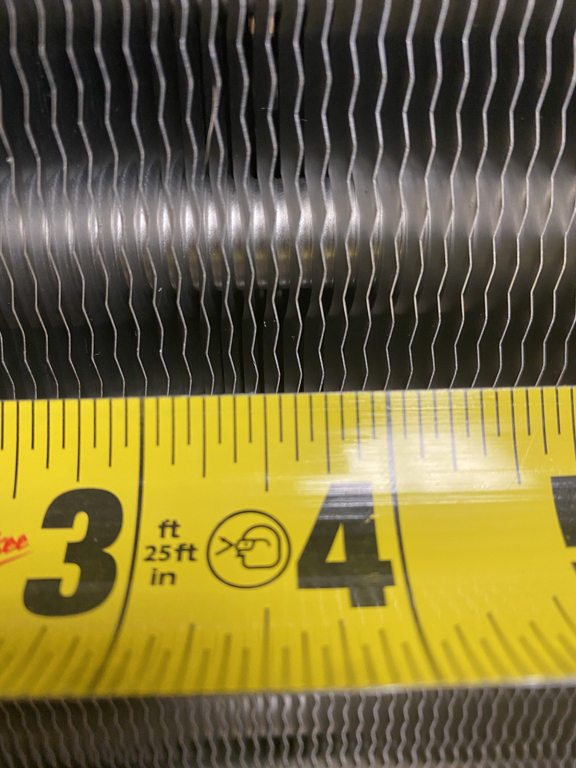
2. On the face, measure the finned length, either at the top or bottom of the coil near the flanges (not the middle). Ensure the tape measure starts and ends inside the end flanges.

While on the face, also measure the fins per inch. You can do this by counting the number of fins between 2†and 3†on the tape from left to right.
3. A key factor in accurate coil pricing is the copper tube size (3/8â€, 1/2â€, 5/8â€) and the number of rows.
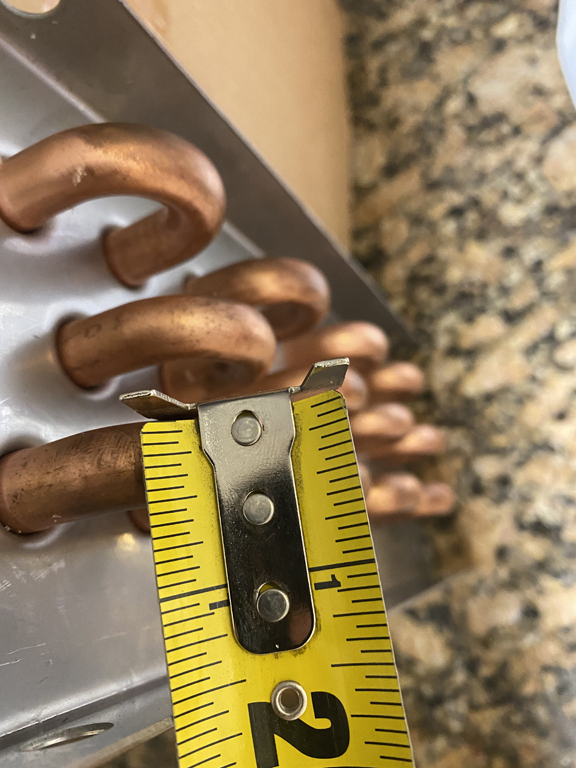
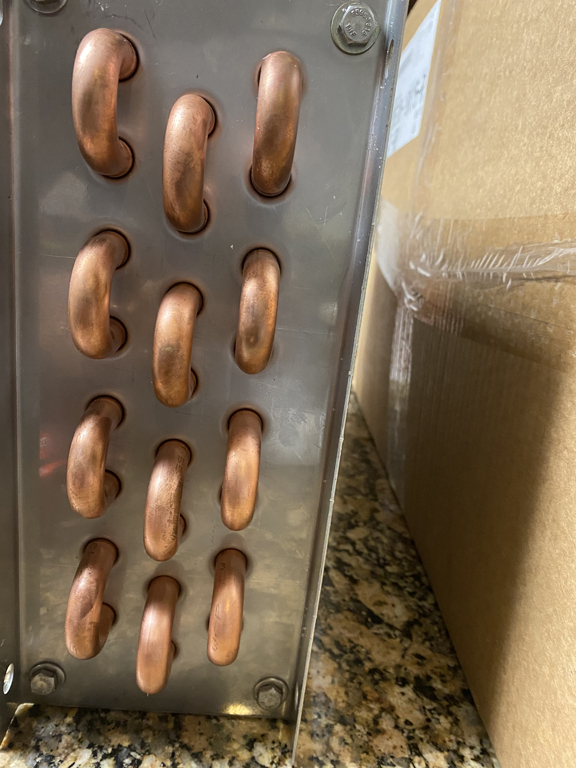
The number of rows can significantly impact the estimate. If you have access to the end of the coil exposing its U-bends, count the rows by determining how many tubes come out of the end plate from left to right. This can sometimes be confused with the number of U-bends, as two U-bends might actually represent four rows. The number of circuits will also affect pricing, which can be determined simply by counting the returns or distributors you see.
If you have access to all the above measurements, you're set to get an accurate cost without worrying about factors that could increase your costs and affect profits. Sometimes, improvisation is needed, and that’s when it becomes crucial to learn what additional performance info the building can provide. For example, if the U-bends on an evaporator coil are not visible from either end, you can use the casing depth and condensing unit capacity to determine the number of rows. Take the casing depth (say 5") and the condensing unit capacity (say 30 tons). If you can figure out the CFM the air handler is running, even better (or around 350-400 CFM per ton). Plug this data in to determine the maximum number of ½" rows (if the copper tube size is ½") that can fit in a 5" casing depth. The selection should ideally bring back a capacity close to the 30 tons you’re calling for, then you can begin quoting and consulting with the customer.
The Nationwide Coils Blog is a commercial HVAC blog written by industry HVAC experts with almost two decades of experience. We offer valuable insights into commercial HVAC products and services and invite you to email us anytime.